2015/03/12: Back online after Reddit
and Slashdot killed my bandwidth with 30,000 visits in the last hours. Followed by HN.
2015/03/11: Update with comments from Matthijs De Smedt.

The original Deus Ex is among the most critically acclaimed PC games of its time and I spent countless hours helping JC Denton fend off the conspiracies of UNATCO or the Illuminati.
I never had the chance to play the second opus “Invisible War”, but I gave a shot to “Human Revolution” when it was released. All I can say is: it lived up to the expectations!
Deus Ex: Human Revolution is a game released in 2011 by Square Enix, and developed by Eidos Montréal and Nixxes for the PC version.
It uses a modified version of the Crystal engine made by Crystal Dynamics and was one of the earliest games to support DirectX 11.
It featured great graphics at the time (still looks good!), and it was as beautiful as light-weight: even low-budget video cards could run the game smoothly.
I was curious about the rendering process, so I spent a few hours reverse-engineering the game, playing with Renderdoc.
Here are the results of my investigation.
How a Frame is Rendered
Below is the scene we’ll consider. This is an actual screenshot of the game: the final image presented on the player’s monitor.
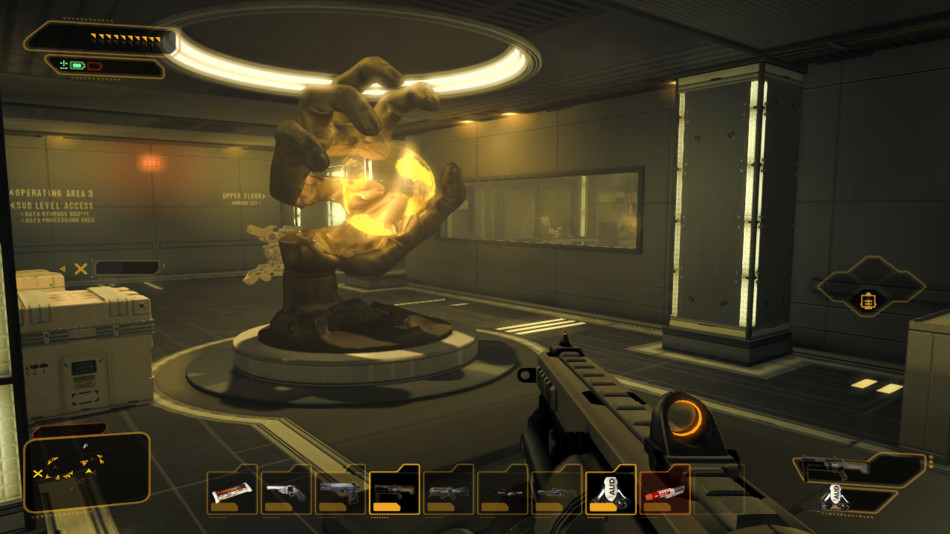
At first glance, Deus Ex HR seems to use an approach similar to the forward+ rendering technique.
Except that the game was developed years before forward+ became popular, actually it uses a precursor technique: the “light pre-pass” approach.
Normal + Depth Pre-Pass
The game renders all the visible objects, outputting only a normal map and a depth map.
Transparent objects are not rendered.
Depending on the mesh, each triangle will be rendered as a flat surface (same normal for all the fragments of the triangle),
or can also be modulated by its own normal map.
For example, the hand sculpture has its own normal map modulating the final normals rendered to the buffer.
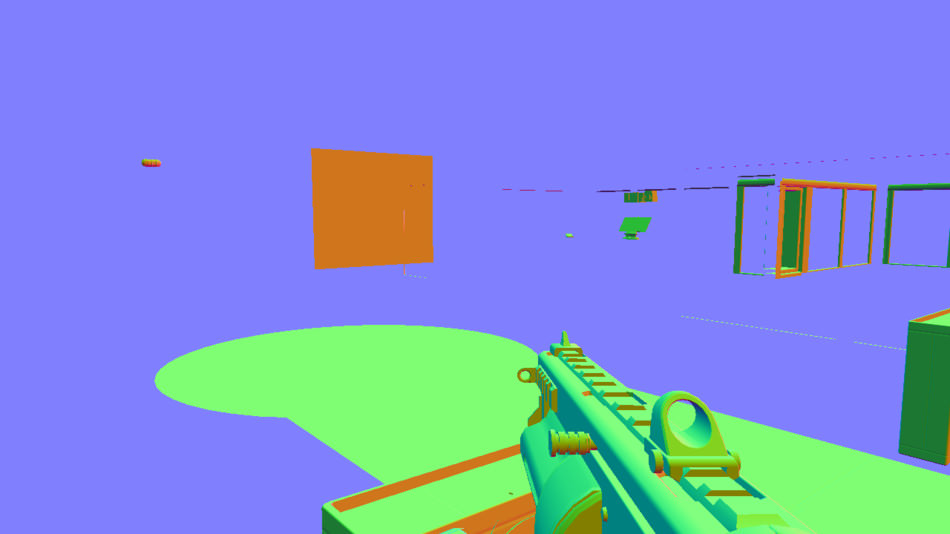
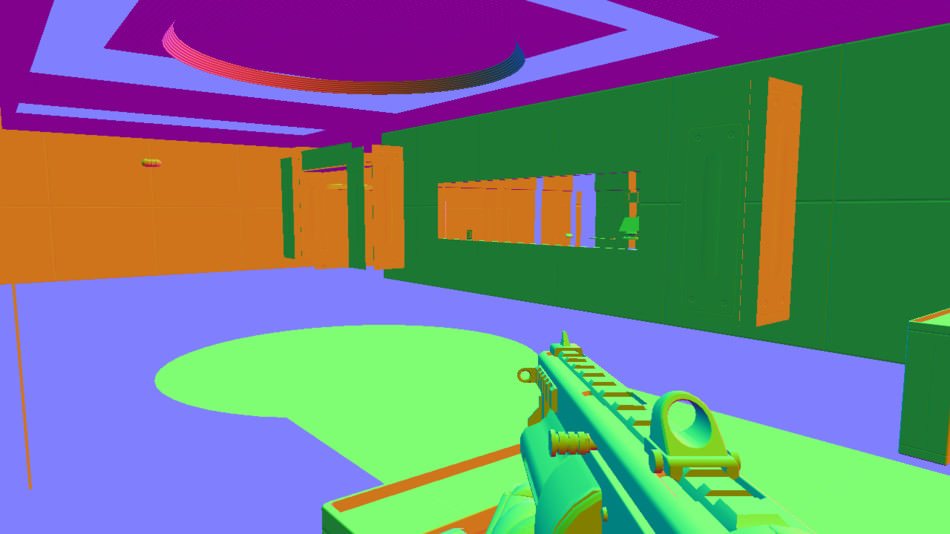
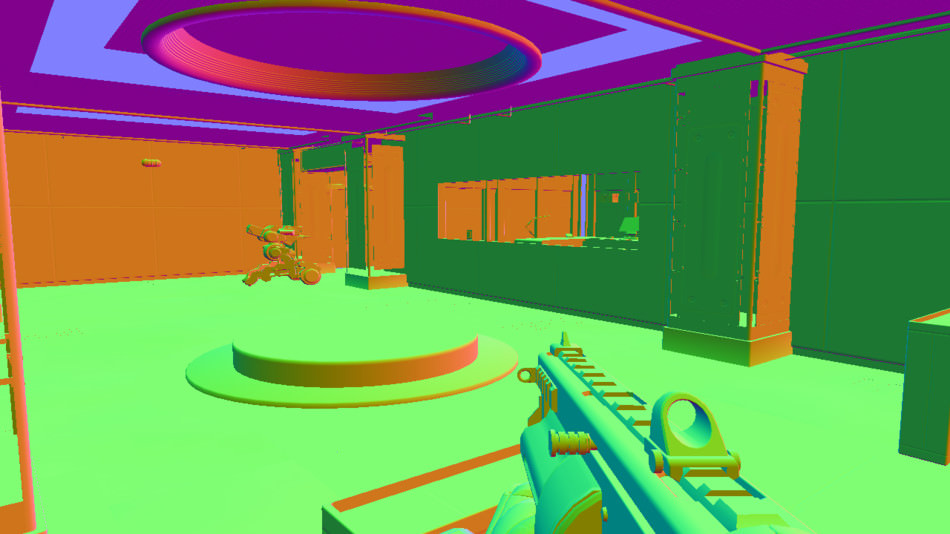
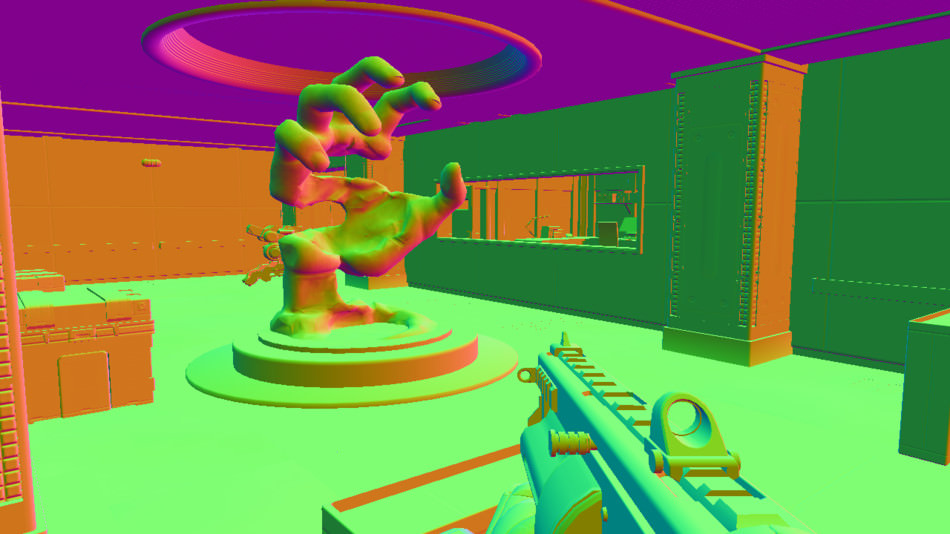
While the normal map is being created, each draw call also generates at the same time the depth map:
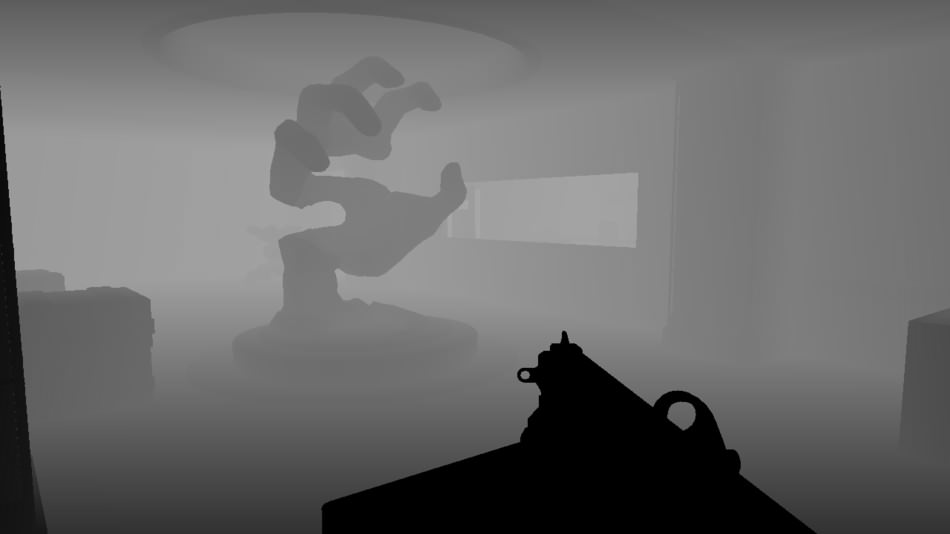
This step is achieved in 166 draw calls.
Shadow Maps
Shadows are generated through the PSSM technique.
In short, the scene is rendered once for each light able to cast a shadow. In our case there are 2 light
sources: one in the small office behind the glass window on the right, and one on the top of the hand sculpture.
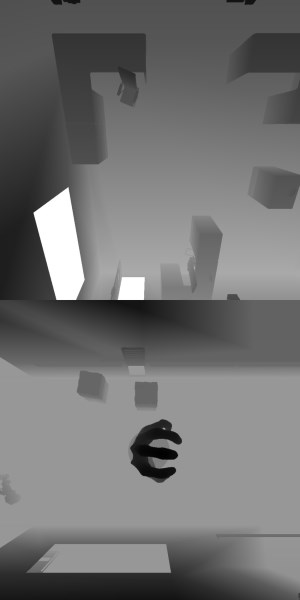
Each shadow map corresponds to a 1024x1024 square inside a 4096x3072 texture.
This pass is done in only 52 draw calls, much less than when rendering the full scene.
This is achieved by marking only the biggest objects as shadow-casters, skipping the smaller ones;
plus some frustrum culling is probably used to render only the objects visible from the light source.
After the different shadow maps are generated, the depth map and the shadow maps are combined to produce a shadow mask texture.
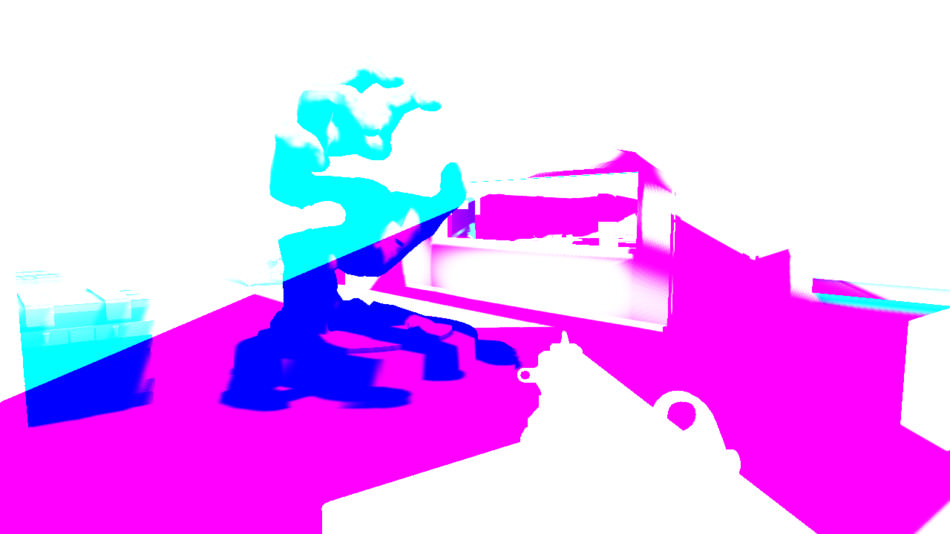
Each texel of the depth map is read, and its visibility is calculated for each light source.
The final result is outputted to an RGBA 8-bit texture which acts like a mask:
the default value is white (1, 1, 1, 1) which means the texel is not shadowed by anything.
If a texel is in the shadow of a certain light source, a byte corresponding to this light source is set
to 0.
The shadow seen under the sculpture fingers is produced only by the light above them, not the office light,
which is why they appear blue-ish: RGBA of (0, 1, 1, 1).
This approach is able to handle 4 light sources at the same time, more if bit-masks are used instead of byte-masks.
Some small visible artifacts are typical of a PCF filtering technique.
Update: Matthijs De Smedt pointed out that each channel for a light source does
not only store 0 or 1 (it would be a waste to use 8 bits for this): during this pass the PCF of the pixel is also
computed and stored inside these 8 bits.
Strictly speaking it is not really a mask: we have a value of 1 if fully lit,
a value of 0 if fully occluded (in the middle of the shadow),
and a value between 0 and 1 around the edges of the shadow (to give smoother borders).
Screen Space Ambient Occlusion
By sampling the depth buffer, the SSAO map is created.
A first “noisy” result is obtained through a pixel shader.
Then on DirectX 11 compatible cards, a compute shader is used to apply a blur with a 19x19 kernel and smooth the result.
On older cards, the blur is done with a pixel shader.
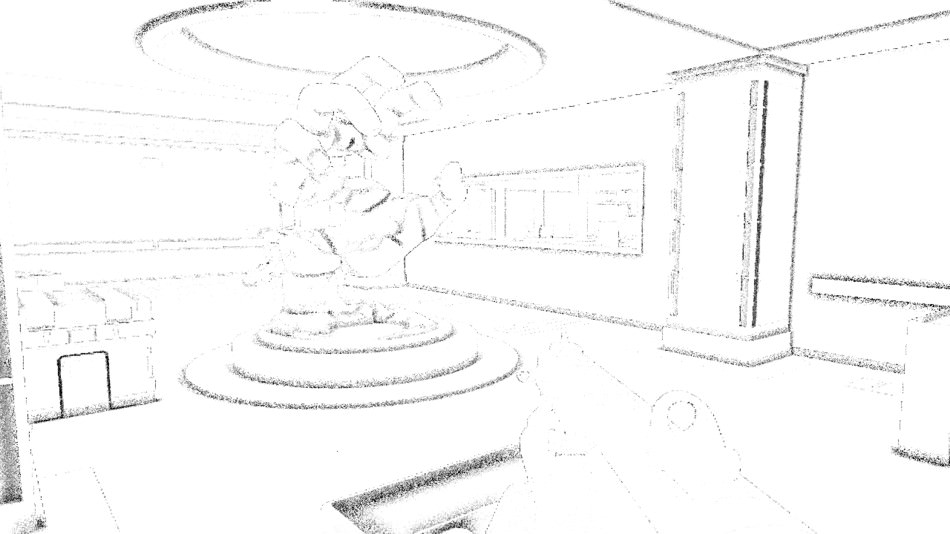
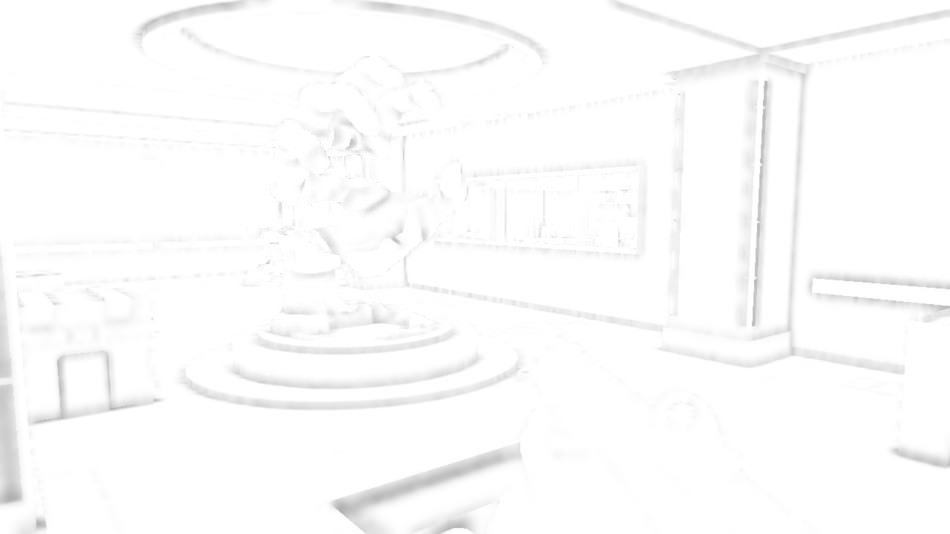
After the SSAO texture is generated its value is stored within the alpha channel of the normal map.

Alpha: Ambient Occlusion
Light Pre-Pass
Each point-light of the scene is rendered one by one.
The only inputs are the Normal+SSAO map and the depth buffer. The pixels affected by a light depends only
on the light radius and intensity.
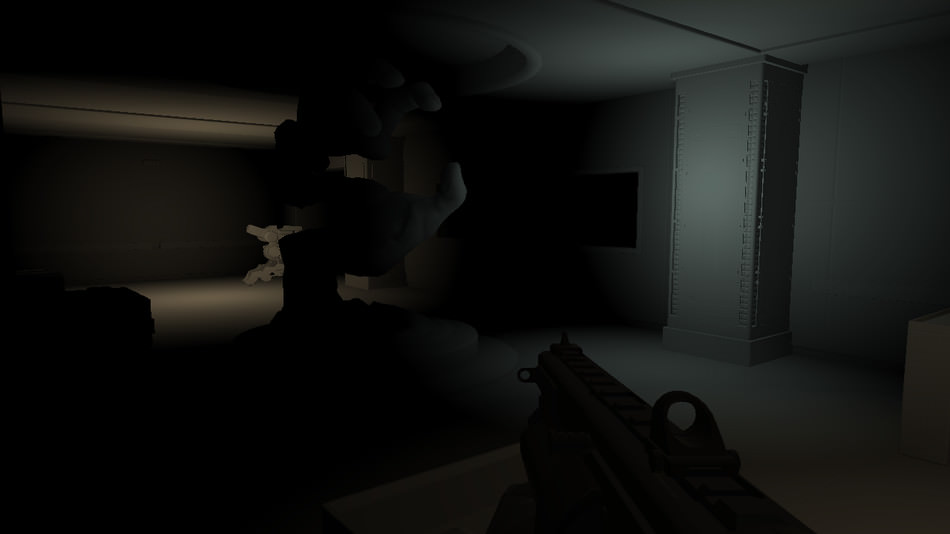
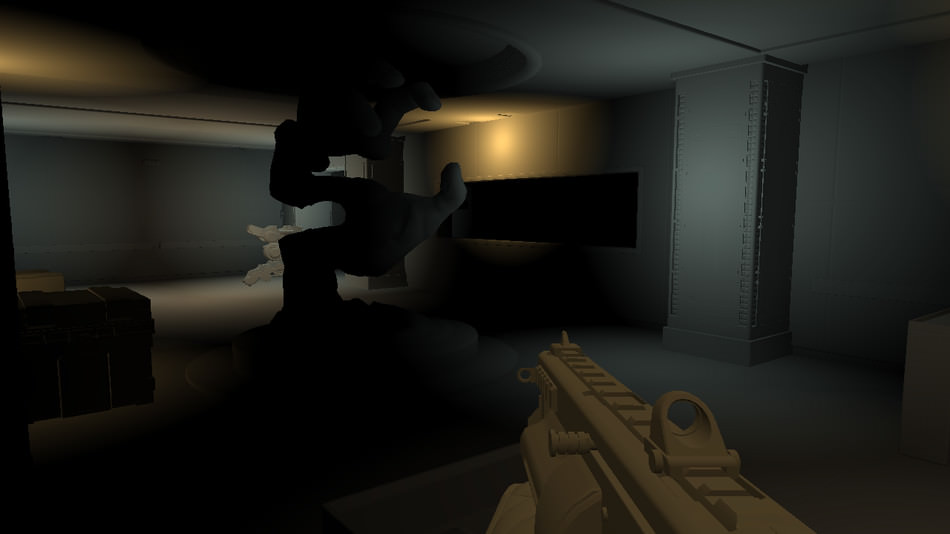
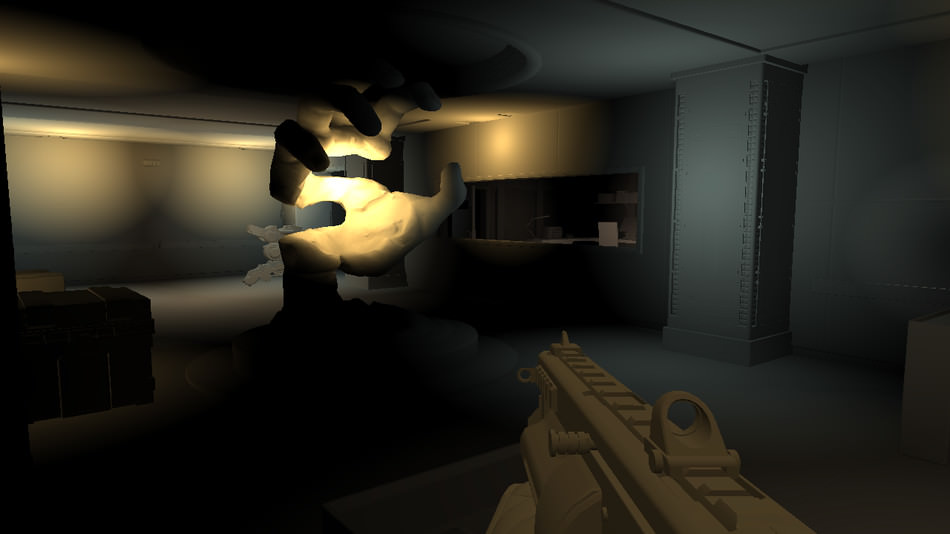
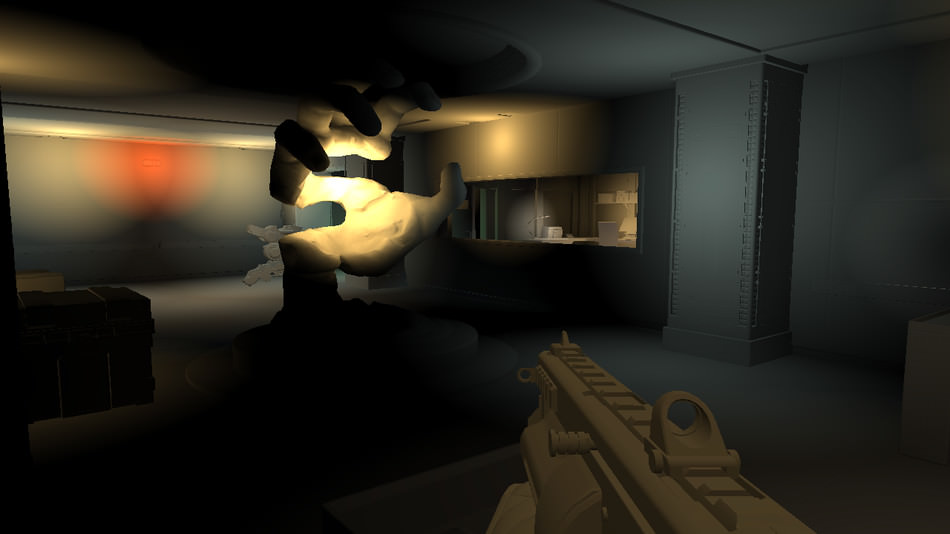
The material reflecting the light is not important at this point yet, the information stored in the light
map is simply how much light is potentially reflected (and its color) for each pixel of the scene.
Later, this irradiance information will be useful to calculate how much light is actually reflected depending
on the mesh material and its specular property.
This scene uses 45 point-lights.
Forward-Rendering of Opaque Objects
This is where the “actual” rendering finally happens.
Every single mesh of the scene is drawn to the screen. The final color of the pixel is calculated from:
- the Normal+SSAO map, the shadow-maps and mask, the light map
- the object’s own textures / material properties
- sometimes, a fake environment map (128x128 texture cube) to enhance reflections of the mesh
First, all the opaque objects are rendered:

Normal+SSAO
|

Depth
|

Shadow
|

Light
|

Mesh textures and env map.
|

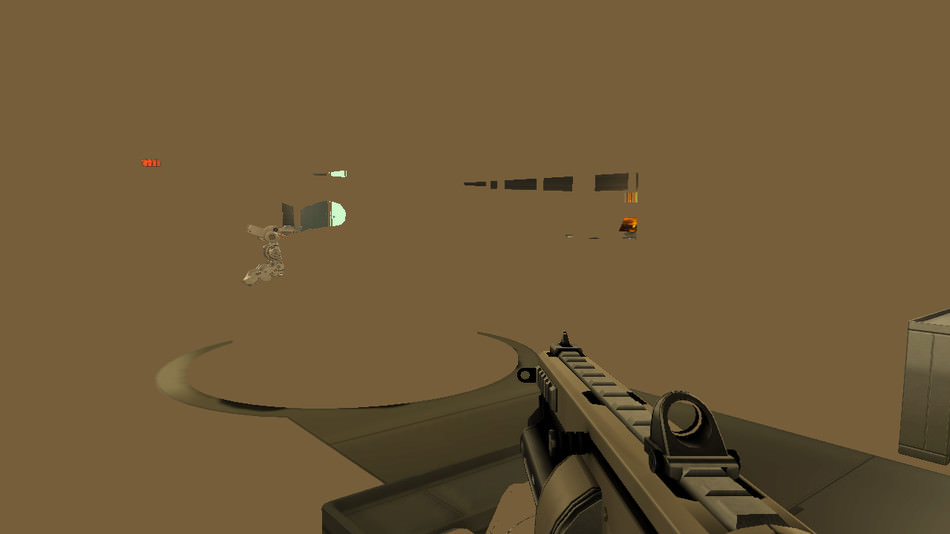
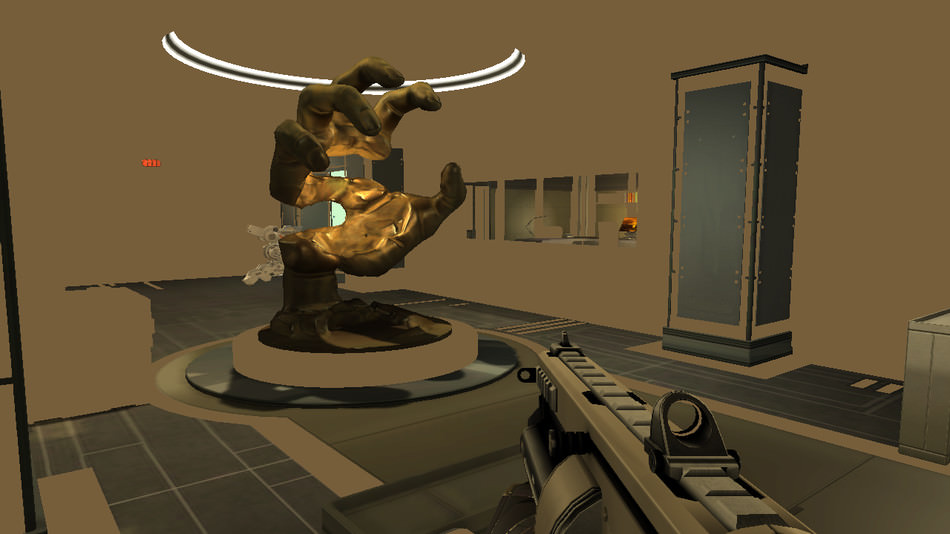
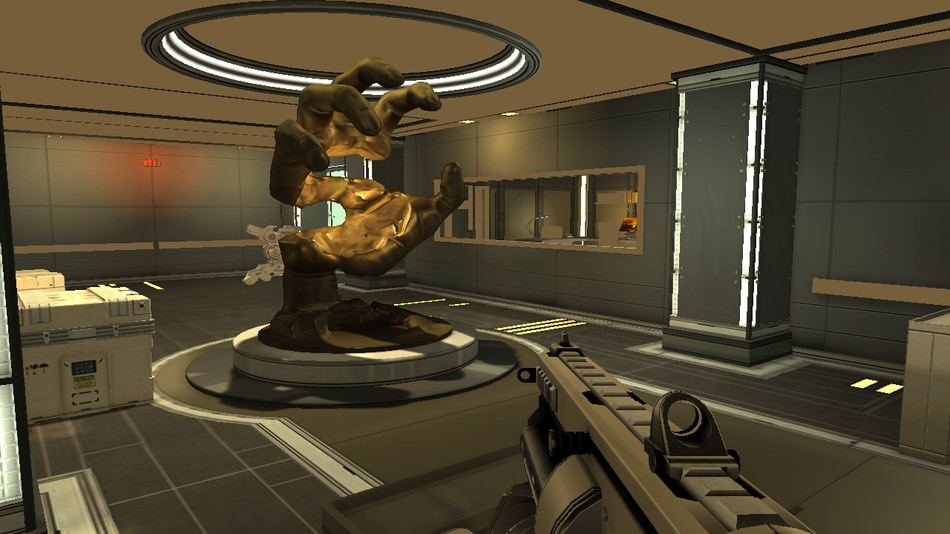
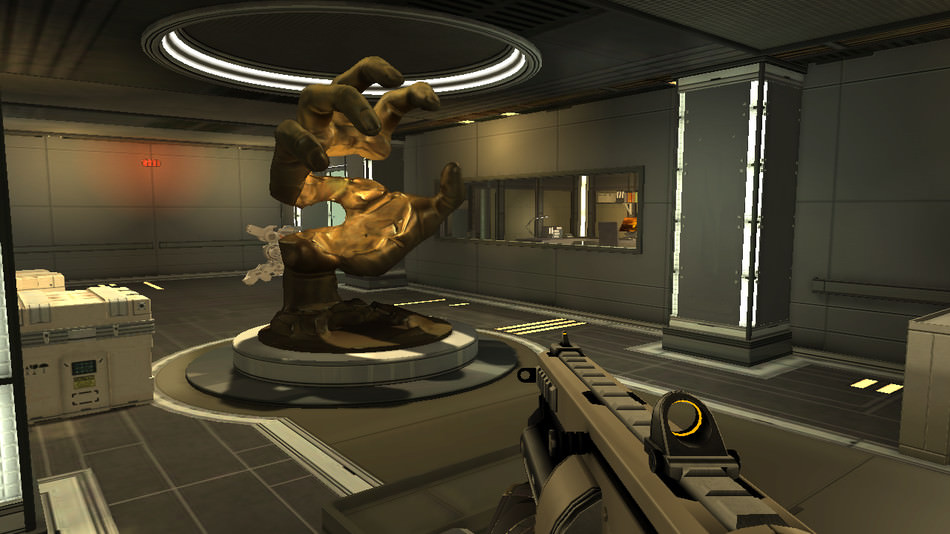
Notice that during this rendering step, the depth test function is set to COMPARISON_EQUAL and not COMPARISON_LESS.
Also, even if the depth test is enabled, depth-writing is disabled.
This is a trick to increase performance: remember that we already generated the scene depth buffer during the normal map creation.
So we already know exactly the final depth value a pixel is supposed to have. By discarding any fragment with the wrong depth,
we avoid heavy shading calculations which will just go to waste when a new fragment, closer to the camera, overrides with its own value.
This effectively achieves a rendering with 0 overdraw.
Transparent Objects
This step renders decals (like signs on the wall, bullet impacts), transparent objects (like window glasses), or fake volumetric-lights (halo of spot-lights).

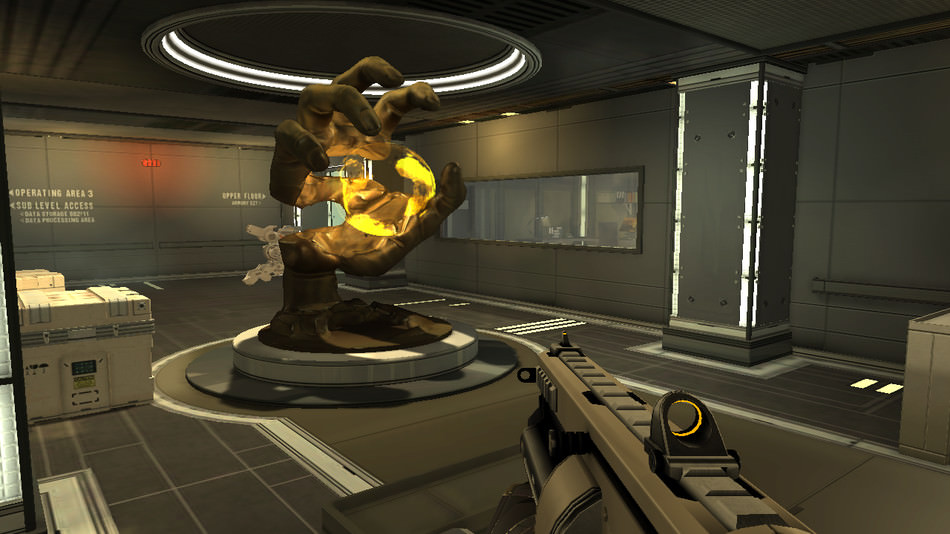
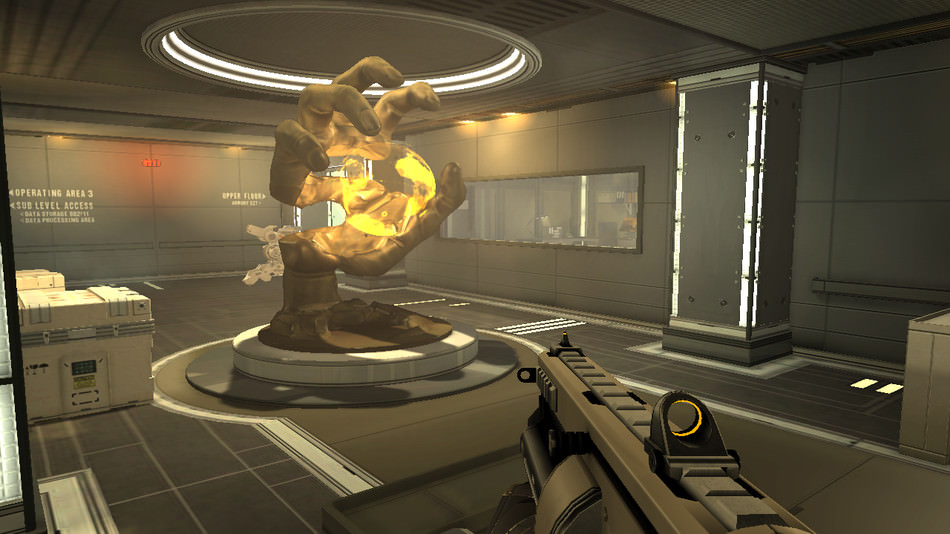
The depth function is of course turned back to COMPARISON_LESS_EQUAL because we don’t have yet any information about the position
of transparent objects at this point. The depth-write stays disabled, to make sure a transparent mesh close to the camera does not cancel
the rendering of another transparent mesh further behind.
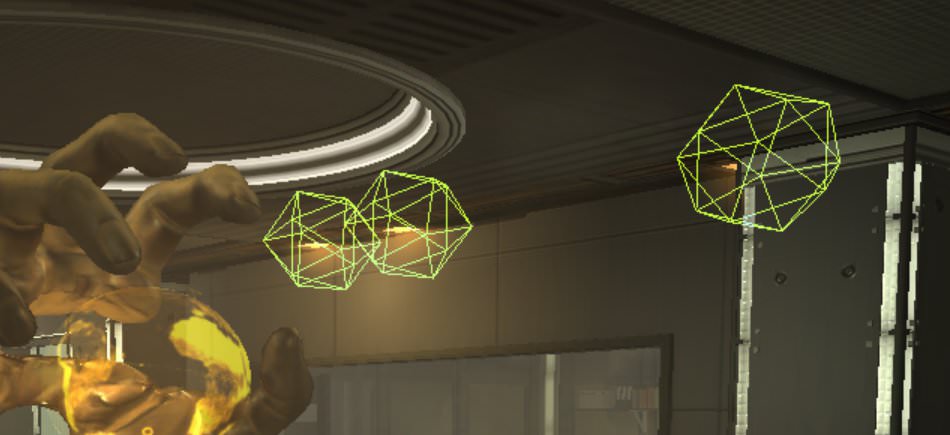
The volumetric-lights look very nice: these are simply a group of “sprites” rendered in 3D in the scene at the good position.
They are not single-sprite-billboards always facing the camera like you could expect, they’re actually icosahedrons 3D meshes scaled correctly to represent the light halo.
The choice of icosahedrons is a compromise: approximating a sphere with as little geometry as possible.
Also these meshes don’t rely on any texture: the “halo” is calculated 100% procedurally. The pixel shader, by sampling the depth map,
can know how far the current pixel is located from the light source, and compute the final color
value based on this distance.
Here is a wireframe representation of the meshes used to create the effect:
For reference the rendering of opaque and transparent objects is done in 253 draw calls.
Light Bloom
To apply a bloom effect, we need to know the set of pixels with a very strong light intensity.
Deus Ex HR uses a simple LDR workflow, there is no HDR buffer on which we could apply a bright-pass filter.
But actually, while performing the previous pass, for each mesh an extra information was being outputted to the alpha channel: the emissive intensity of the mesh.
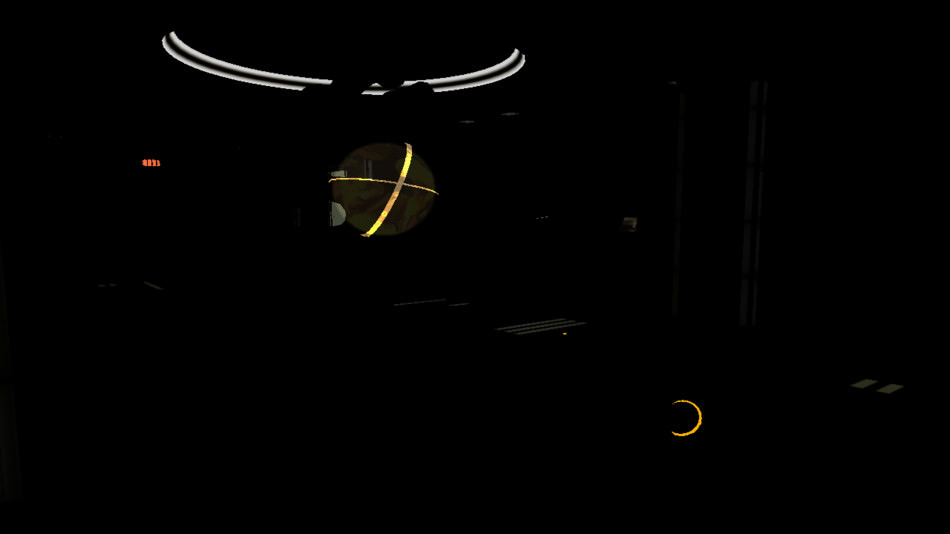
This is enough to create a bloom layer: the idea is to simply apply a Gaussian blur with a large radius.
The image is first downscaled to half, then one-fourth of the original size (to make blurring more efficient) and finally blurred.
Scale x0.25
|

Apply blur |

|
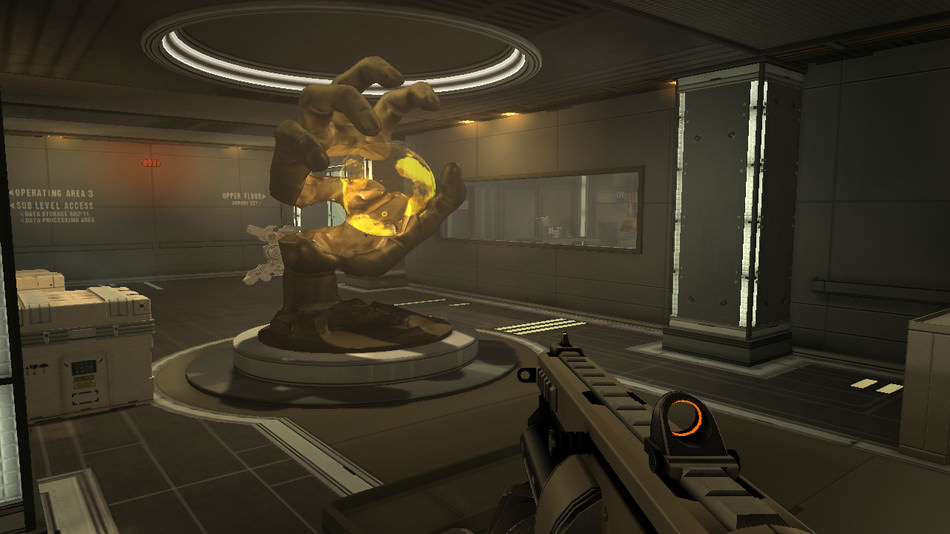
After we obtain the blur of the bright areas, we simply need to blend it on the top of the original scene. The blending is additive, because we only want to add brightness to some areas, never darken anything.
Anti-Aliasing
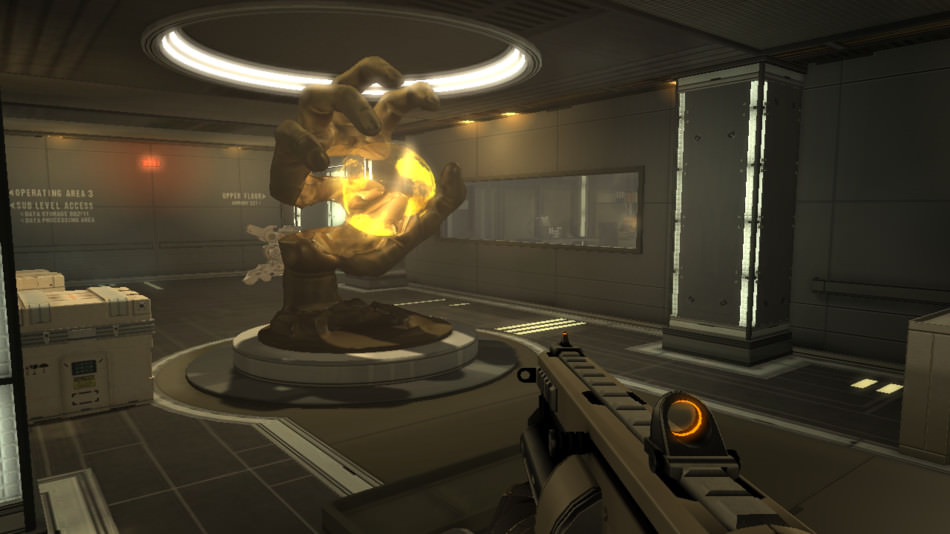
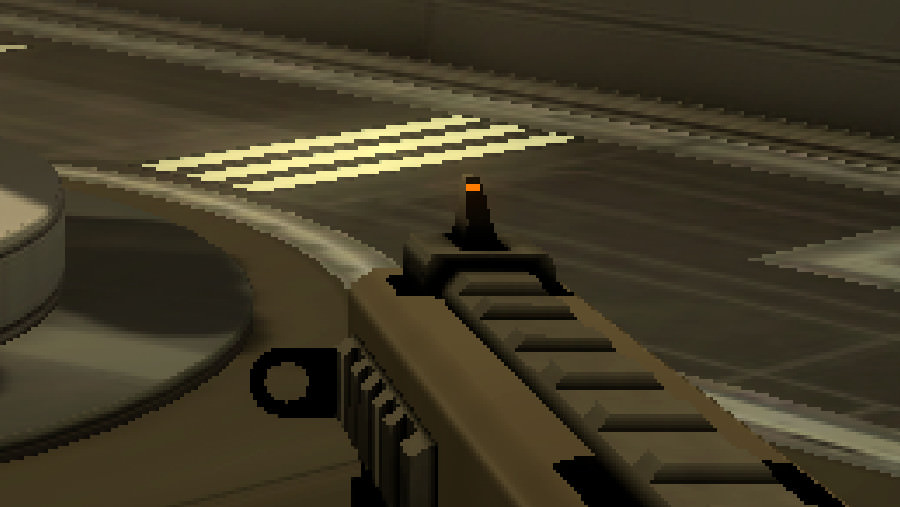
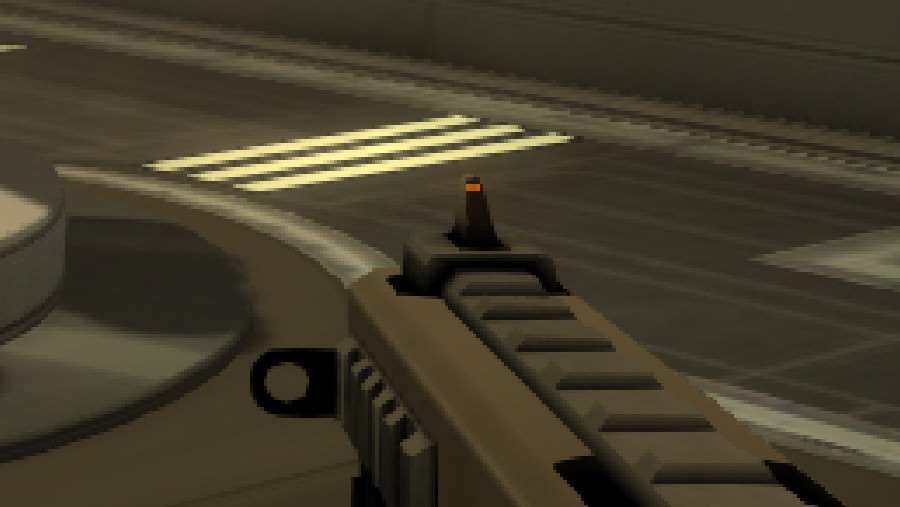
To smooth-out the jagged lines on the edge of the meshes, Deus Ex HR supports different techniques of anti-aliasing like DLAA, MLAA, FXAA…
Here’s an overview of the correction when using FXAA:
FXAA Off
|

|
FXAA On
|
Color Correction
We’re almost done for the scene, it’s already looking pretty good.
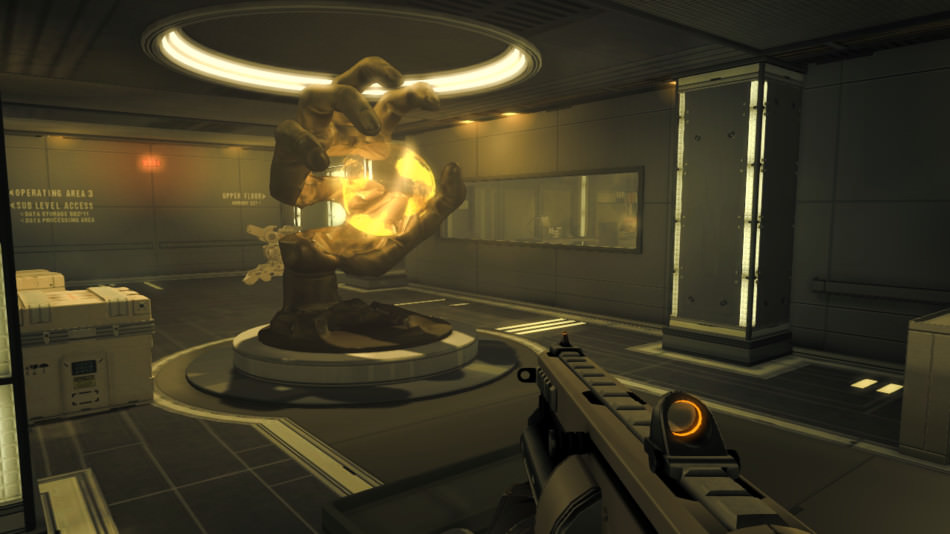
The last touch is a bit of color correction: gamma correction is applied and then a special pixel shader
is used to give a yellowish tone to the scene.
The yellow tint, sometimes referred to as “gold filter”, is a bit like the trademark of the game.
For those who don’t like it, some mod exists to disable it.

User Interface
The final step is to render the UI on the top of the view. This is done in 317 draw calls.


And we’re done! The texture is finally copied to the back-buffer and presented to the user.
Timeline
Just to give a rough idea of the cost of each step of the process, here is a quick comparison of the time required to process the steps.

Bonus Notes
Depth Of Field
I don’t think the DoF effect is ever used during the gameplay phases, but it is always present during the cinematics or the dialogs. The technique used in Deus Ex HR is the most basic you could think about: a 2-layer DoF, using Gaussian blur.

Original Scene
Downscale and blur

|
|

#1: Scale x0.5

#2: Horizontal Blur
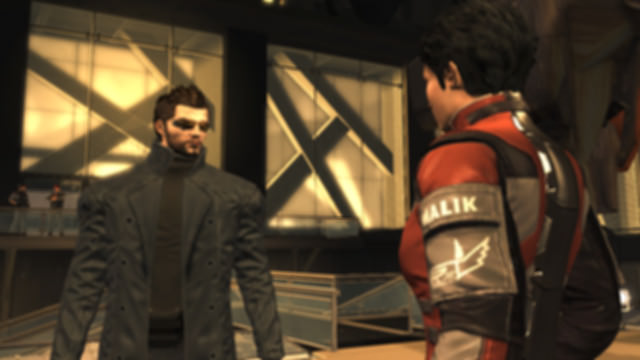
#3: Vertical Blur
|
After we obtain 2 versions of the scene: the original crisp one and a blurred out-of-focus version, a pixel shader will lerp
between the 2 layers, depending on the pixel depth.
Too near or too close, the shader will use the blurred image; but at the right in-focus distance, the shader will use the original image.

Original
|

Blur
|
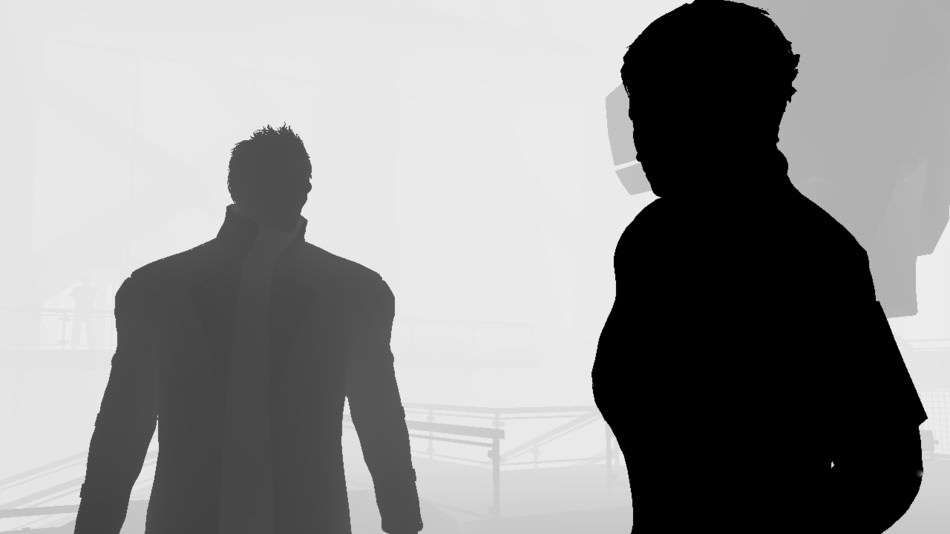
Depth
|
 Depth-based interpolation


The Gaussian blur can be performed on compute shaders on compatible hardware, with a fallback to pixel shaders.
Silhouette Effect
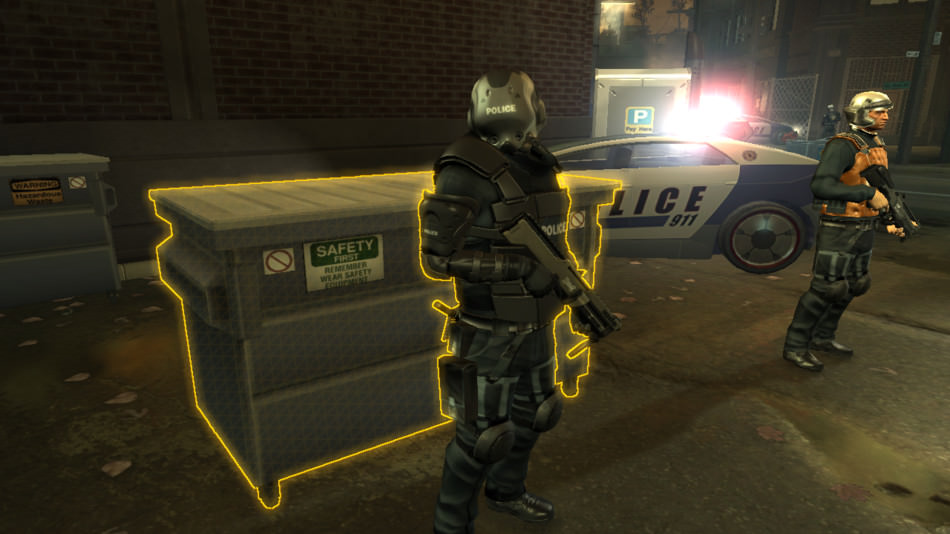 While playing, it is possible to interact with various objects of the scene.
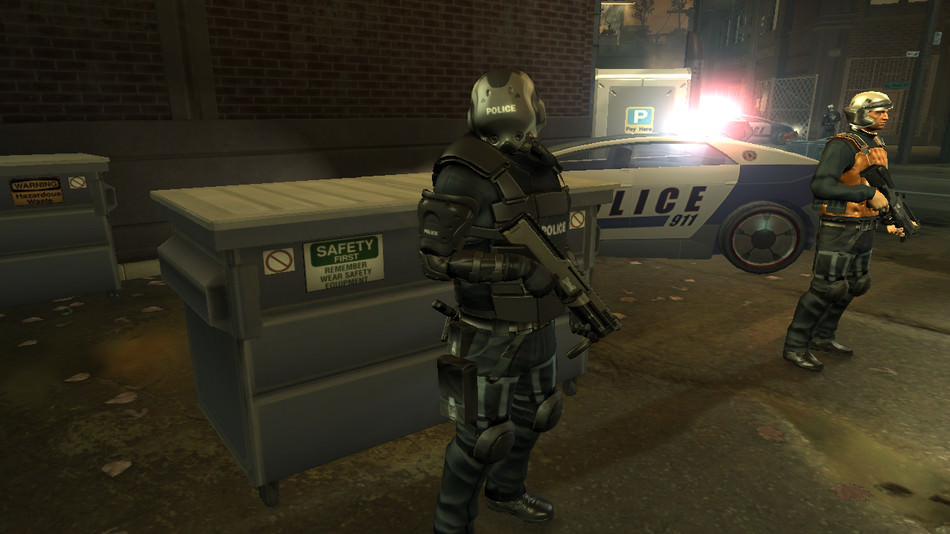
The game indicates which object the player can manipulate by coloring them yellow and drawing a shiny silhouette around them.
In some games, the effect is very basic: sometimes the mesh is simply drawn at a bigger scale outputting a constant color; sometimes after the whole scene is rendered the relevant mesh is drawn again with some color and alpha modulation on the top of the final image.
But in Deus Ex HR the silhouette effect is perfectly integrated: any occluder in front the interactable mesh affects the final silhouette. Note how the shiny outline does not only follow the shape of the container but also the one of the policeman in front of it.
So how is such effect achieved?
It’s a very simple trick. Remember the light map containing all the irradiance information for each pixel of the scene?
We only need the RGB channels to store the irradiance, the alpha channel is not used. And this is precisely in the alpha channel
that the game stores information about pixels belonging to an interactable object.
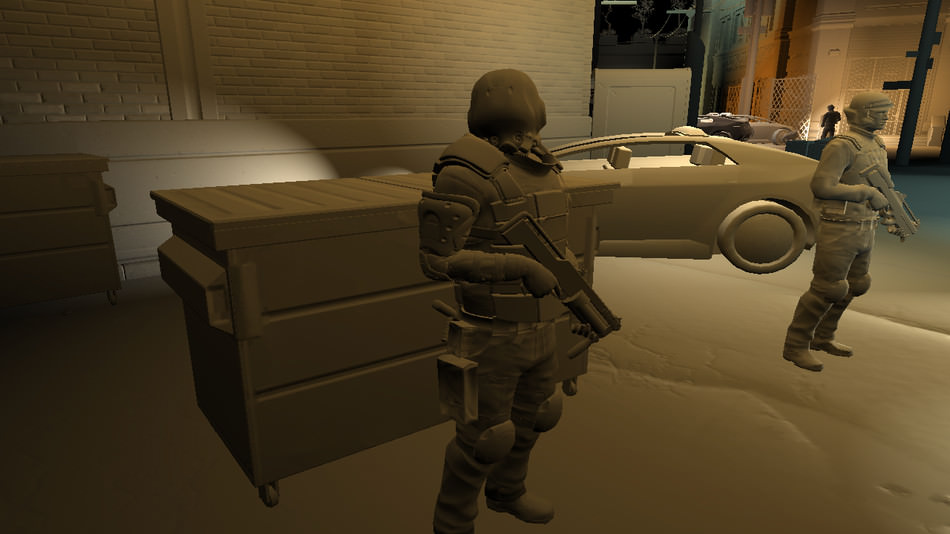
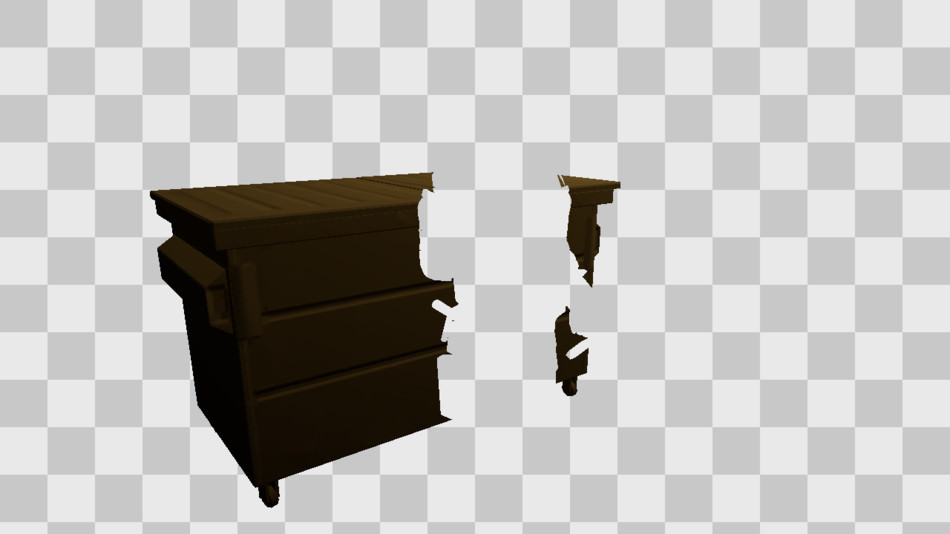
Well this is the only information we need to draw the silhouette: after the scene is rendered, but before the bloom, an extra pass occurs. This pass draws an overlay on the top of the scene: the pixels marked as interactive are rendered with a yellow tint modulated by a texture with some triangles-pattern, finally a Sobel-like edge-detection operator is used to draw the silhouette. Drawing the silhouette also outputs to the alpha channel of the render target: this is where the information about the brightness is located. The bloom effect will then make the silhouette shine.

Further Readings
There are still many things that could be said about Deus Ex HR, if you want to know more you can check out some of the links below.
Deus Ex is in the Details – GDC 2012 presentation by Matthijs De Smedt.
The Design Challenges of Deus Ex: Human Revolution – GDC 2012 presentation by François Lapikas.
Building the Story-driven Experience of Deus Ex: Human Revolution – GDC 2011 presentation by Mary DeMarle.
More discussion on this very topic: Slashdot, Hacker News, Reddit.